Pages

Friday, December 21, 2012

KinderStampO Design Team Announcement and Holiday Cheer Blog hop...

Welcome to the...

KinderStampO Design Team Announcement and 
"Holiday Cheer" Blog Hop...

I am so excited to share our creativity with you...

We have fun projects, challenges, features and surprises in store for you and I can't wait for you to be a part of it ! 
Welcome to my blog... I'm Elisa Kammerdiener and I am the Design Team and Guest Design Team Coordinator for KinderStampO!

I love crafting and being inspired by others.

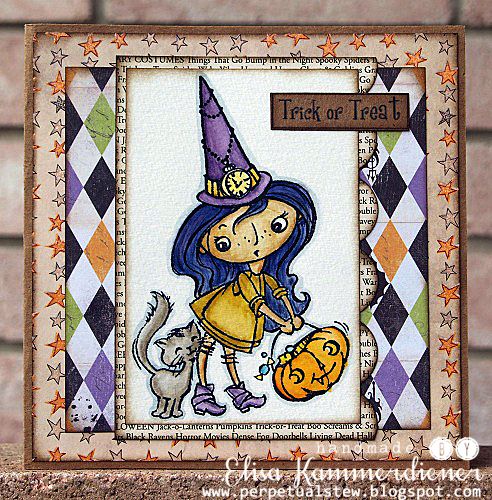
Here is my project that I would like to share with all of you...

Products used:
KinderStampO Vintage and Traditional Christmas Stamp set.
Core'dinations White Shimmer Cardstock
The Paper Studio Pattern Paper (hobby lobby)
Pickled Pear Stamp Set (Holly Leaves)
Holiday images
Seam Binding
Queen and Co Gems
Kraft Paper
Embossing Folder
Momento Black Ink


                                                          A Holiday Gift for You....
                                                  10% off all items from the store.
                                                  Use Coupon Code: holidaycheer
                                                    www.KinderStampO.luulla.com
                                                                      
Giveaway 

                            --A stocking valued at over $100 worth of KinderStampO products --
                                                        

                                                             How to enter to win
                                       
Your next stop is Limor Webber's Blog
                     
Here is the full list just in case you get lost along the way...

KinderStampO  http://www.kinderstampo.com
Suzi Mac  http://wwwsuzies.blogspot.co.uk
Cat Beaty   http://catscreationsscrapbooks.blogspot.com
Elisa Kammerdiener  http://www.perpetualstew.blogspot.com
Limor Webber http://chicscrapbookdesigns.blogspot.ca/
Raffaela Perego   http://miomondodiscrap.blogspot.nl

Pin It!

Thursday, December 20, 2012

The KinderStampO Guest Design Team "Holiday Cheer" Blog Hop

Welcome to the  
KinderStampO Guest Design Team "Holiday Cheer" 
Blog Hop...

As the KinderStampO Design Team and Guest Design Team Coordinator I am so excited to share everyone's creativity with you...

 We have fun projects, challenges, features and surprises in store for you and I can't wait for you to be part of it !
My Name is Elisa Kammerdiener
My favorite thing about crafting is being inspired by others.

Here is my project for today's blog hop...

Products Used:
KinderStampO Vintage and Traditional Christmas Stamp Set
Doily
My Minds Eye Patten Paper
Impress Glittered mitten
Tim Holtz Distress Ink
Mini Tree (hobby lobby)
Snowflake Stamp (Michaels)
Twine
Seam Binding
Tag
Numbers (Hobby Lobby)
Queen and Co Gems.

                                 Holiday Gift for You....
                                                  10% off all items from the store.
                                                  Use Coupon Code: holidaycheer
                                                    www.KinderStampO.luulla.com
                                                                      Giveaway
                            --A stocking full of KinderStampO products --
                                                        

                                                        How to enter to win
           http://www.luulla.com/store/kinderstampo
  • Follow the KinderStampO blog
          www.KinderStampO.com

Your next stop is Amanda Tibbitts blog

                                   Here is the full list just in case you get lost along the way...
Be sure to tune in tomorrow.... Till then... Happy Crafting...

Pin It!

Monday, December 03, 2012

Feliz Navidad Tag...

So with it being December and still in the high 70's here in Texas. I thought it was the perfect time to get into the Christmas Spirit and start creating some Christmas Gift Tags...  Most of my stuff is still out in the garage awaiting us finding a house to buy so I am limited to what I managed to pick up a few Christmas/snowy things but when creating I would really love to have a lot more options, but I am making the best of what I have with a Hobby Lobby/Michaels trip planned for today... hehe

Here is my first Christmas tag of the year...  Using my Ipad to take my photos and edit them as I got a new computer and can't seem to find my photo shop cd yet. I'm sure it's in the garage packed with all my amazing Christmas embellishments...

Products used:
Manilla Tag
My Minds Eye Pattern Paper
KinderStampO Vintage & Traditional Holiday Stamp Set (Feliz Navidad)
Purple Cows CraftGeek Pin It Pins (Bells and Key Hole)
Michaels Stamp (Snowflakes)
Snow Flakes (Hobby Lobby)
Recollections Washi Tape (music notes)
Tim Holtz Ink (Frayed Burlap)
Tim Holtz Distress Markers (Frayed Burlap, Stormy Sky)
Momento's Ink (Black)
Twine
Seam Binding

Here is a close up photo

Thanks so much for taking a little peek at my blog.  I will be back with another project tomorrow.  Till then... Happy Crafting.

Pin It!

Friday, November 30, 2012

Banners, Banners and more banners

It seems like the past month I have been creating banners and more banners for friends, family and co workers...  I love being busy and I love that when I give them to the people who wanted them they ask me how did you know I loved this etc....

Here are some photos of the last banner I created for a friend at work...


products used:
Chipboard
October Afternoon Pattern Paper
Recollections Pattern Paper
Basic Grey Pattern Paper
Bazzill Cardstock
I am Roses Flowers
Doilies
Lacy with Pearls (joanns)
Momenta Metal embellishments
Queen and Co Pearls
Jolee's Glittered bird cage and birds
Twine 
Cricut Cartridge Pretty Pennants

Thanks for looking and I will be back tomorrow with another project.... Maybe another banner.. hehe

Pin It!

Thursday, November 15, 2012

Happy Thursday and An Altered Canvas...

This week has seemed to zip right on by.  I have to say I love work weeks like that... The faster they zip on by the sooner the weekend is here. lol  So yesterday I shared the altered cigar box I created for my secret sister so today I thought it would be fitting to share the altered canvas I created for her. The theme is grunge which I love cuz almost anything can be grunged up.   Here is what I came up with and please don't mind my dirty outside table.  

Products Used:
Canvas
Wooden Frame (Michaels)
Paint (black and cream)
Martha Stewart (Fine Crackle Effects)
Lace
Flat Back Pearls
Rose Stamp
Tim Holtz Distress Ink
UTEE
Impress Butterfly Brads
I am roses flower (brown)
Websters Flower (blue)
Pearl
Button

Here are some close up's...


Thanks so much for visiting my blog today and I hope you will be back to see what else I have been up to and creating.  I will be back up tomorrow with another project.  Till then... Happy Crafting.

Pin It!

Wednesday, November 14, 2012

I'm Back and with An Altered Box..

Ugh I know it's been a couple weeks, but things have been busy around here and at work, but I have a weeks worth of projects scheduled up so that's a step in the right direction....

I love to alter things and boxes in one of my favorite things to do...  I was recently in a swap and created this cigar box for my secret sister...  I really hope she liked it...


Products used:
Cigar Box
Mod Podge (matte finish)
Pink Paislee Pattern Paper (She Art)
I am Roses (roses and leaves)
Lace
Flat back Pearls
Tim Holtz cards
Momenta Metal Corners and Flowers
Boot Button
Tim Holtz Inz (black soot)
Washi Tape (michaels)
black paint


Thanks so much for looking.  I will be back tomorrow with another project to share.  Till then... Happy Crafting.

Pin It!

Thursday, October 25, 2012

Happy Fall....

Today I have a quick card to share with you... I created it for Purple Cows and you can see this card with instructions on the Purple Cows Blog.

Supply list...
Purple Cows CraftGeek Pin It and Laurel Leaf Pins
Purple Cows Wire
Bazzill Cardstock
American Crafts Pattern Paper
My Mind Eye Pattern Paper
Recollections Pattern Paper
TPC Studio Pattern Paper
Kraft Paper
Tim Holtz Distress ink (gathered twigs)
Ranger Green Alcohol ink
Copic Purple Pen

Here is a close up for you...


I would also like to share a Fall photo with you today... My mom took this photo and I spotted it on her Facebook page and had to snag it... It really makes me miss home, my parents, family and friends. 

Love the color on the trees this time of year... We don't have that kind of stuff here in San Antonio. lol 

I will be back soon with another project.  Till then.... Happy Crafting.

Pin It!

Wednesday, October 24, 2012

Lets go on a Hay Ride...

A couple weeks ago some new scrappy friends here in San Antonio were heading to the new Archivers about an hour or so north of here.  So I kindly asked if they see a stamp I was looking for (ok lets be honest here I really NEEDED the stamp) that I would be for ever grateful if someone could pick it up for me and I would meet up with them asap to get it and of course pay them for it.  So I guess all the planets were aligned and luck was on my side as it was there and they snatched it up for me. (Thanks again ladies)  So with that said here is my card using the Stampendous Hay Ride Kiddos stamp....

Isn't the stamp cute... Now you see whey I really NEEDED it... hehe

Products used:
Tim Holtz Distress Markers
American Crafts "Farmhouse" Pattern Paper (6x6 pad)
Kraft Paper
Water Color Paper

Here is a close up of the card...

Here is the stamp...

Thanks so much for checking out my blog... I will be back tomorrow with another project.  Till then... Happy Crafting.

Pin It!

Tuesday, October 23, 2012

A Happy Owloween Tag...

When I have a creative block or not sure what to create I take out a tag, stamps and some scraps along with some ribbon etc. and get busy...   Here is one of the tags I created this past weekend.

 Products used
Hampton Arts Stamps
Tim Holtz Distress Markers
Ranger Archival Ink
Distress Ink
Vintage Lace
Maya Roads Twine (black and white)
Grey Seam Binding
K12 Studio Twine (purple and white)

Here is a close up of the tag...


Here is the stamp set..
Isn't it cute... My hubby actually found this stamp set for me as we were walking around Michaels one day.. If you know me you know I simply adore owls... So of course he got some brownie points that day. lol

Thanks so much for looking and I will be back tomorrow with another project. Till then... Happy Crafting!


Pin It!

Monday, October 22, 2012

Happy Monday and A Halloween Card

Happy Monday everyone...  First up is a Halloween Card I created with the Mumeek Stamp from Stampendous that I colored with my Tim Holtz Distress Markers...

 Products used:
Tim Holtz Distress Markers
Ranger Archival Ink
Recollections Pattern Paper
Happy Halloween (computer generated)

Here is a close up for ya...


Here is the amazing stamp from Stampendous
 I am really loving all the new stamps from Stampendous this year.... Can't wait to get busy on Christmas cards with some of them, but first I have to find the stamps in the stores...lol 

 So on to my weekend... which I spent it running here, there and everywhere.  Still trying to find my way around San Antonio. I still get lost..lol  While running around on Saturday we passed a cowboy boot store called Cavender's Boot city.  So on Sunday after the grocery shopping etc was done hubby and I decided to check it out.  Let me tell ya this place was packed with all kinds of Cowboy/Cowgirl boots.  Hubby got a chuckle out of me.. He is from Texas and well Cowboy boots have been a part of his life since he could probably walk. lol  Anyway Ladies if your looking for some bling on ya boots this is the place to go.. lol  So in walking around I discovered the Justin Ladies Gypsy boot collection and fell in love with this pair...


These boots are a total of 8" high vs the normal 12-13" which I love as the longer boots never fit my chubby legs right so I never wore boots before.  I am already planning on a 2nd pair. hehe   I hope your weekend was filled with fun adventures...

I will be back tomorrow with another card.  Till then... Happy Crafting.

Pin It!

Friday, October 19, 2012

An Altered Halloween Canvas...

So here's the story why my little blog has been suffering...  I started working Full Time again.  I love my job don't get me wrong, but I'm not gonna lie I also loved crafting 2-3 hours a day sometimes more.  Now I depend on the weekends to craft and I always seem to put my blog on the back burner.  So from here on out I am setting aside some time on the weekend to get my blog all scheduled for the week.  I hope that will help in getting things back on track because I have lots to share. hehe

With that said here is a project I made a couple weeks ago for Purple Cows.

Products Used:
Canvas
Wood Frame (Michaels)
Distress Ink
My Minds Eye Pattern Paper (6x6 pad)
Glossy Accents

Here is a close up photo for ya. 


A super fun and easy project to create to dress up a entry table or wall.  I promise it's super easy to do and one you an create in a mater of minutes.

As always my Purple Cows Projects come with a supply list and instructions...


Halloween Canvas by Elisa Kammerdiener I will be back soon with another project. Till then... Happy Crafting.

Pin It!

Wednesday, October 10, 2012

I love October...

So now that I am finally feeling better and back on schedule I have had some time to decorate and create and what can I say but I just love October!!!  I love all the fall colors and smells etc.  Pumpkin Pie scented anything, all the pumpkins and fall decor oh how I love to decorate the house for fall and of course we can't forget about Halloween...  Speaking of Halloween I have been having some fun creating, stamping, coloring, cutting and gluing Fall/Halloween paper to this and that. Creating some fun and spooky cards and lots more that I will be sharing throughout the month of October... With that said lets get to it..

Every October I get all my Halloween pattern papers out and create some fun haunted house Halloween cards.  I just love cutting them this way and that way etc to make the tops of the housed look either spooky or whimsical etc.  Here is the first Haunted house card I created this year....

 Products Used:
Fancy Pants Oct31 Pattern Paper
Recollections Pattern Paper
Kraft Pattern Paper
Purple Cows CraftGeek Wind It and Wire
Tim Holtz Walnut Stain Ink
Black Sharpie
Happy Halloween (computer generated)

Here is a close up...
You can find the full instructions on the Purple Cows Blog.

Thanks so much for looking and I will be back soon with another Haunted Halloween project. Till then... Happy Crafting.

Pin It!

Friday, September 28, 2012

Sending yall a little treat today...

So this week hasn't been the greatest as I have been a bit under the weather, but today I feel some what better and hope things will improve over the next few weeks.  About a week or so ago I was able to sit down and create in my new little happy space.  Hubby happened to locate a stamp I was looking for so I took out my Tim Holtz Distress Markers and got busy coloring up this adorable stamp from Stampendous.

Products used:
Stampendous "Kitty Candy Kiddo" Stamp
Tim Holtz Distress Markers
(Dusty Concord, Mustard Seed, Black Soot, Pumice Stone, Tea Dye, 
Wild Honey, Spiced Marmalade, Dried Marigold and Crushed Olive)
Recollections "Night and Fall" Pattern paper (stars)
Recollections "Midnight Magic" Pattern paper (words)
Fancy Pants "Oct 31" Pattern paper (Diamonds)
Tim Holtz Distress ink Walnut Stain
Water Color Paper (for stamped image)
Ranger Archival Ink
Kraft Paper
Trick or Treat (computer generated)
Water Brush

Here is a close up

So I had a blast using the distress markers to water color the image.  I also took some marker techniques to add feathering to the hair etc. 

Now I must find this image from Stampendous.. It is a must have...

It's called Hay Ride Kiddos... Isn't it adorable... I must have it. 

Thanks so much for looking and I will be back soon with another project.  Till then... Happy Crafting!

Pin It!

Tuesday, September 18, 2012

Settled and Missing you...

Wow I never thought with moving etc that it would be this long since I last posted.  Where did all that time go.  I swear it only feels like it's been a couple weeks since I last posted, but a month in a half is just crazy.  Well we are finally in Texas and settled into a small little 3 bedroom rental till we find the home we want to buy.  Since our master bedroom is so huge hubby suggested I take a corner and set up a little crafting area for myself.  I have to say I am rather lucky that he supports my crafting enough to put an area in our master so I wouldn't have to lug my stuff out from a closet or garage every time I wanted to craft.

Now that almost everything I need is out of a box and has a spot I am back to creating and I love my new little area as it's all clean and tidy etc; but I am missing all my scrappy friends from Washington.  I just so happened to have the perfect stamp set on my table and created a card to let all my scrappy friends back in Washington know that I miss them and I'm thinking of them...

Products used:
Unity Stamps (sending my love)
Crate Paper Pattern paper (little BoPeep)
Tim Holtz Distress Markers 
(crushed olive, worn lipstick,walnut stain, broken china, tumbled glass and barn dorn.)
Water Color Paper
Kraft Paper
Momento Ink (tuxedo black)
Tim Holtz Distress Ink (Walnut Stain)
Ribbon


Here is a photo of my little crafty corner... 


I am still looking for the boxes with my coke and wine crate to store my Copic/Pro Markers, My Twine, smaller stamps and washi Tape etc.  Once I get those they will be added as well as some wall decor.. I also need to paint my cubbie storage on my desk (the blue and purple thing).  I am thinking of the same color as the teal crates or maybe even white. Anyway this is my little crafty corner.. It's not a whole room like I had before, but it's only temporary till we find the perfect house to buy.

I will be back tomorrow with another project.  Till then.... Happy Crafting and thanks for stopping by.


Pin It!

Monday, July 30, 2012

A Shabby Chic Frame + another b-day.

This past weekend we celebrated yet another birthday... My middle son turned 14.  He had a fun get together with a few of his friends and what started out with 6 boys spending the night turned into 10.  It was one loud night and I will be the first to say I am thankful that we had a few tents for them all to sleep in and the weather was amazing!


Today I would like to share a "shabby chic" frame that I created for Purple Cows using the CraftGeek Punch It Spring Punch.


I love the detailed effects and the amazing backgrounds etc you can create with the Punch It tool. Below is the full printable pdf with supply list and instructions. 

Altered Frame by Elisa Kammerdiener
Thanks so much for checking out my blog today.  I will be back with another project soon.  Till then... Happy Crafting.

Pin It!

Thursday, July 26, 2012

How I create and a Card...

Do you find yourself digging in that big bin of $1 stamps at Michaels?  I am always checking them out for some good sentiments, words etc.  I found the one below a few months ago and just love the 2 different fonts on it.  When creating cards I usually have 2 small 5x7 shallow baskets on my desk.  I will grab some sentiment stamps wood and clear, ink and a clear block and put it in one basket while the other will have a mix of embellishments, ribbons etc.  I like having a few small baskets on my desk that hold all the bits I am working with so they are at my finger tips.  I hate having to hunt for things when I'm creating.  Having things gathered up this way sure makes creating easier and neater for me.

With that said here is a card I created with some left over Prima flowers and that awesome $1 sentiment stamp from Michaels...

Products used:
Graphic45 Pattern Paper
Kraft Cardstock
Prima Flowers
StudioG Stamp (Michaels)
Tim Holtz Distress Ink (Walnut Stain)
Pop Dots

Thanks so much for stopping by my blog.  It really does mean a lot.  I will be back tomorrow with another project. Till then... Happy Crafting.

Pin It!

Wednesday, July 25, 2012

My little box of scraps... {post #1}

We have been packing and purging big time for our move next month so I'm sad to say it also includes my scraproom.  In the process of all the madness I came across an accordion file folder filled with some pattern paper scraps from several years ago.lol  I decided to trim a few of them to sizes that would be great for cards and put in my little box of scraps. (it really is just one of those photo boxes from Micheals).  My little box of scraps consists of paper scraps that are already cut down into squares, rectangles and some smaller strips no bigger then 5"x5".  Plus cardstock strips and chipboard pieces already stamped with sentiments.  Some odds and ends like the last flower or die cut from a package, the last bits of ribbon etc.  It's perfect to take with to a crop or when you need to create a last minute card etc.  Anyway getting back to the accordion file filled with scraps of pattern paper.  After I cut down the ones I liked and wanted to keep for cards etc. I decided to leave a few of them on my desk as I was planning to scrap later that day and wanted to use them for a few cards I had ideas for.  I picked out a few leftover embellishments from the box and once I sat down to create I was ready with most of my supplies. It totally helps the creative process and I get a lot more projects done with things already cut etc.

Here is one of the cards I created with the old scraps and a few things from my little box of scraps as well as couple supplies that were left on my desk from a previous project (wire embellishment and gems).  So you see it eventually gets used up.  I would also recommend only having ONE little box of scraps so supplies get used instead of sitting for years like the accordion file folder did.  I plan on posting cards I created from my little box of scraps once a week...

Products used:
Pattern Paper (I think it's foofala?)
Bazzill Cardstock
Little Yellow Bicycle scalloped die cut (i think)
Purple Cows CraftGeek Wind It tool to create wired embellishment
Prima Flower
K12 Studio Sentiment Stamp (mothers day set)
Ribbon
Staz-on Black ink
Gems
KI Memories chipboard piece
Tim Holtz Walnut Stain distress ink


Thanks for taking the time to read my blog.  I will be back tomorrow with another project.  Till then... Happy Crafting.

Pin It!

Tuesday, July 24, 2012

A Birthday Boy and a Card.

Today is my little guy's 11th birthday... I still can't believe he's going to be in the 6th grade. He is a funny little guy with a heart of gold.  He cracks me up with all the funny things he comes up with.  A few of his favorite things right now is playing Skylanders, watching the History channel, riding the dirt bike and chillen out on the computer.

I love this photo of him as it captures his funny side, but also shows how much he wants to be like his dad.

Since he is my baby I thought I would share with y'all a baby card that I created showcasing some fabulous I am Roses and the amazing Purple Cows Wind It and Pin It tools.

Products used:
Graphic 45 Pattern Papers
Kraft Cardstock
Purple Cows CraftGeek Wind It, Wire, Pin It and Pin
I am Roses Flowers
DMC floss
Tim Holtz Distress Ink (Old Paper)

Here is a close up of the wire embellishment I created with the Wind It tool from Purple Cows along with the Pin It and the flowers from I am Roses. 

Thanks so much for looking.  I will be back tomorrow with another project.  Till then... Happy Crafting.

Pin It!

Monday, July 23, 2012

A couple cards and HSN...

Today I have a couple cards to share with y'all... I created these cards for Purple Cows to be showcased on HSN with the amazing CraftGeek Wind It tool...  So if you have a chance to watch the show will air today at the 3pm EST show.  I really do hope my cards make the cut and end up on the show.  You never know what there going to like and what they won't like until you watch the show and see.  So with that said here are a couple cards I created for the show.


Here are a some peeks of the other cards I created.  I will post these through out the week.


Here is the Purple Cows CraftGeek Wind It tool and Wire you will see on HSN


Thanks so much for looking at my blog.  I really do appreciate it.  I will be back tomorrow with another project.  Till then... Happy Crafting.

Pin It!