Ok so on to my cards. This first card I created I used this weeks sketch at Get Sketchy Card Challenges.
Wednesday, November 03, 2010
A couple new cards...
Ok so on to my cards. This first card I created I used this weeks sketch at Get Sketchy Card Challenges.
Tuesday, November 02, 2010
Thankful for My Family
Thanks for looking and I will be back tomorrow with a couple cards.
Wednesday, October 27, 2010
Vintage Santa Images
I love using all the different clear shapes that Clear Scraps makes. I enjoying using them on my layouts and altered projects but most of all I love using them as the focal point of my cards. Today I am showcasing Clear Scraps "Small Stars" which are great for any project no matter what theme or event your working on. I love to ink them up and emboss them to make them stand out more on projects.
Here is my card showcasing the Clear Scraps Small Stars
Here is a close up of the star
Trim out Santa from pattern paper and apply Vintage Glitter Glass with favorite adhesive and then pop dot to center of star.
Tuesday, October 26, 2010
A Christmas Card and a couple winners...
With that said here is a card that I made this week using this weeks card sketch at Card Patterns.
TeenaBugg38 said...Your cards are adorable!!! I am already a follower :)Thanks for a great giveaway!
and
Casey Wright said...These cards are super cute!
Saturday, October 23, 2010
Cards for men...
This first card features a kraft mini bag from Scrap Within Reach. It's a great way to add a gift card to your card.
Don't forget to leave me a comment on my previous post for a chance at a sweet little giveaway.
Friday, October 22, 2010
A couple cards & a Giveaway...
First up is a Winter theme card that I created using this weeks sketch at 2 sketches 4 you. I just adore the sketches each week...
I have several snowflakes, 3 different U-Cuts and some Kraft Cardstock and Satin Ribbon Packaged up and ready to send to two lucky people. All you have to do is leave a comment. If you want to try your chances twice all you have to do is sign up to follow my blog.
Thursday, October 21, 2010
Aluminum Foil and Alcohol inks
Supplies needed:
Scrap paper
Glue Stick
Alcohol inks (I used Terra Cotta Black and Metallic gold)
Aluminum foil
Inking tool
Leaf dye and embossing folder
Instructions:
1. Tear off some aluminum foil and crush it up a bit
2. Apply glue to scrap paper
3. Place aluminum foil on top of scrap piece of paper and smooth it out
5. Shake Metallic Gold alcohol ink and apply a few drops directly to your leaf

I also did the same technique on a pumpkin.
If you are local to me I will be teaching a class using Aluminum foil and alcohol inks creating 5 different Christmas Cards at Lilas Scrapbooking in Everett. Here is a peek at 2 of those cards.
Wednesday, October 20, 2010
Trick or Treat
Thanks for looking and choosing to come visit my blog.
Wednesday, October 13, 2010
I just love Halloween & Clear Scraps Contest...
So naturally today I want to show you a Halloween Card. I did the whole Witch and Black cat thing but I promise you it's not scary at all. I also used this weeks sketch at 2S4Y.
Clear Scraps 12x12 Acrylic
Hambly lace transparency
Rusty Pickle Pattern Paper
Vintage Halloween Image
Doodlebug Glitter Paper
Kaiser Crafts Black Gems
Colorbox charcoal glitter
Ribbon (M's)
I used Cricut design studio to create my frame. I so love design studio
Here is this weeks sketch at 2S4Y that I used for my inspiration.

Now if you simply love making all things Halloween and mixing in some Clear Acrylic with your creations then please get in on this contest for a great Acrylic goody bag.
We want to see your acrylic Halloween projects!
Cards, layouts, candy boxes...whatever you want - just show us how you would use some acrylic to celebrate this spooky holiday.
Send your projects to: contest@clearscraps.com
One project per person, please. Submissions to this contest will be posted in a Facebook album for easy viewing and each submission will be an entry into a drawing for a prize package from Clear Scraps. If you'd like a second entry into the drawing - become a Facebook Fan or a Blog follower and we'll put you in there twice (or 3 times if you submit and follow both places). Drawing will take place on Halloween night and the winner will be announced the next day on the Clear Scraps blog.
Don't forget I will be back here in a couple days with another card and a step by step tutorial on playing with aluminum foil.
Thanks for looking.
Monday, October 11, 2010
Welcome Fall...
So with it being fall and all I thought I would show a fall theme card today.
Couture Cardstock
Rita Marie Pattern paper (plaid)
My minds eye pattern paper (frame)
aluminum foil
alcohol inks
ribbon
vintage music paper.
Thanks for looking and happy fall to you
Sunday, October 10, 2010
A couple cards to start off the week.
Today I would like to show you a few cards that I made for Scrap Within Reach.


The pattern papers are from the Afternoon Tea collection. Which if you love pink then this collection is for you... Of course I had to punch out some butterflies as you can never go wrong with a butterfly for an embellishment..
Thanks for looking and I hope you will be back tomorrow to see more cards...
Tuesday, October 05, 2010
Halloween Card Class & winner to RAK
If your local to me I have an upcoming Halloween card class at Lila's Scrapbooking and more on Wednesday October 6th from 3-4 or 5-6 You will create 5 different cards for $15.00 Here are a few cards that you will make at the class.
If you can't make it on the 6th. I also have the same class on October 15th from 1-2Ok so lets get on to the RAK winner... This weekend I put up a card I created in honor of World Card Making day and asked ya to leave a comment for an awesome card kit RAK. That lucky winner is....
Melissa said...
This is really pretty!
Melissa
http://www.burstsofcreativity.blogspot.com/
October 02, 2010 5:48 PM
Melissa please e-mail me at ElisaK12 at gmail dot com
Thanks for looking and I will be back tomorrow with another project. If you aren't a follower of my blog yet please sign up as there will be more RAK's, contest announcements and the list goes on.
Saturday, October 02, 2010
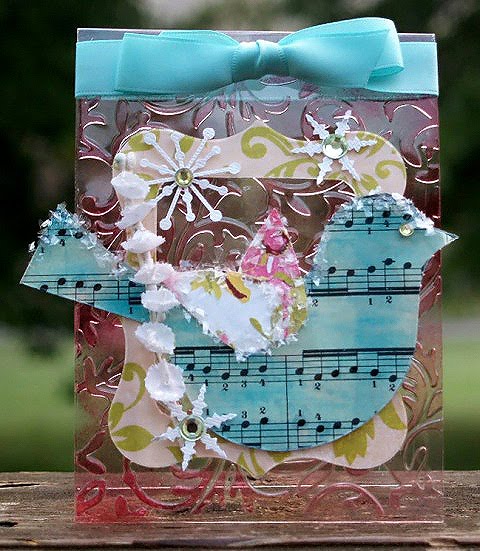
Today is National Card making day
Clear Scraps 12x12 Acrylic Sheets
Clear Scraps Decorative Frames
Staz-on Ink (teal and black cherry)
Embossing folder
The girls Paperie pattern paper
Vintage music paper
Mellissa Frances Mica Flakes
Gems
Vintage flowers
bazzill bling (snowflakes)
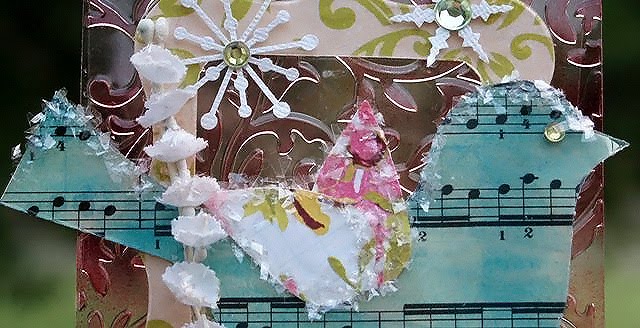
Here is a close up of the bird

Are you planning on making any cards today? If you do please leave me a comment so I can hop to your blog. Plus one lucky person will win this special card kit from me.
Thursday, September 30, 2010
Happy Halloween Banner
Products used:
Hambly Grid Transparency
Graphic 45 Pattern Paper
Accents Black Butterflies
Hot off the Press bat brads
Vintage black lace
Black tulle
Recollections alphas and black rose brad
Staz-on Black ink
Black Bat ribbon (michaels)
Glossy Accents (for adhesive)
Here are a few close up photos.
Tips:
Don't forget to take off protective coating.
I applied all the Staz-on to my pieces first
I applied the Hambly to the back of my pieces and only put adhesive where my papers were on the front.
Thanks for looking
Wednesday, September 22, 2010
Back on Schedule...
I have been busy scrapping away and teaching classes at Lila's Scrapbooking and More. I always love doing Christmas Cards and love that all the ladies from last year have signed up for my Christmas Classes once again. It's always a fun time.
Here are a couple cards from my last card class. I always make up extra kits that we put up for sale in the store for those that aren't able to make the class or haven't had a chance to get in the store for a few weeks.

My next Christmas card class is on October 27th from 3-4 or 5-6 but on October 13th you can join me for my 1 and only Halloween class this year time is 3-4 or 5-6. Hope to see ya there.Now that things are finally back on a schedule I will be blogging more and more.
Till next time.
Happy Crafting
Thursday, September 02, 2010
I adore the XL shapes from Clear Scraps
I love working with all of the XL shapes from Clear Scraps. Today I am sharing a layout that I did with the XL Deco Squares. They come 2 to a package with 2 different shapes. If you are wondering or looking for a different XL shape then Clear Scraps has got you covered. There are several different shape combinations for you to choose from. See XL SHAPES on the Clear Scraps Site for more choices.
Products used:
Clear Scraps XL Deco Squares
Melissa Frances Pattern paper
Making Memories Pattern paper
Prima flowers & bling swirl
Petaloo flowers
My Little Shoebox mini purple alphas
Zig Paint Marker
Brown ink
Jenni Bowlin bingo card (I cut the top off and used it as my title)
MS butterfly punches
Here are a few Tips that I wrote down while I was doing this layout.
1. Using the Zig Paint Marker shake it up very well and just follow your edge. Go slow if you don't have a steady hand. It dries pretty quick which is nice.
2. While it's drying get your papers cut and trim your edges with your favorite decorative edge punch.
3. Ink all the edges of your papers.
4. Find some of your favorite embellishments that you have in your stash that will work with your papers. A lot of times I will just use what is left on my desk from a previous layout or project. A great way to use up those stragglers.
5. Build your layout on the XL Deco Acrylic shape with a strong adhesive. Remember the laws of gravity. A few of my favorites are Zip Dry and 3-in-1 which are both made by Beacon and are a wet adhesive. If you are a dry adhesive user Glue Arts High Tac works great.
6. The little black polka dot butterflies where punched from the package that the bling came in.
Thanks for looking,
Friday, August 27, 2010
Clear Scraps blog hop featuring Unity Stamps...
I choose to feature a layout using the XL Deco shape and a few of my favorite Unity stamps from the June, July and August "kit of the month" sets.

Using Staz-on Teal ink I stamped an image several times to create a pattern for the background of my layout. I then added my photo and stamped the word Love using black Staz-on ink. I then stamped a few other items on Kraft paper and added them as embellishments to my page along with a button. I then turned my layout over and painted on the back so my stamped images would pop on the front. I finished off the layout with some alphas for my title and some simple sweet journaling.
After you leave a comment please hop on over to Cathy's blog as she has a fab project to share with you. Remember to leave a comment on all the blogs and then on Clear Scraps blog to be entered in for an awesome Clear Scraps prize.
If you happened to get to my blog other then the hop here is the order of the designers blog to hop along to.
Grace's blog
end here: Clear Scraps blog
See you back here Monday when I give you a little peek into the inside of my card sketch book. If your not a follower yet of my blog yet I would love you to be. Click on follow on the right side bar.
Thursday, August 26, 2010
My card sketch book....
This weekend I will share a few pages from the inside along with the cards that came from those sketches.
Also be sure to check back tomorrow (Friday) when Unity meets Clear Scraps... It's gonna be quite the pair. Oh and lets not forget about the prize at the end of the rainbow...